

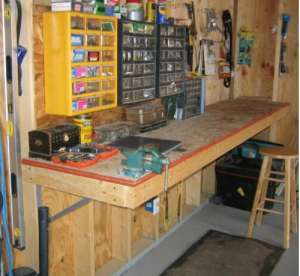
Build an All in One Workbench for Your Garage? There are only a few things in this world that have versatile usage. You can perform a wide range of tasks in a garage workbench.
Here’s the thing-
Building a garage workbench is super easy. You’ll just need some wood and a few tools. The rest depends on your time and effort. You can finish up Build an All in One Workbench for Your Garage even within a day if you want to.
But there’s a catch-
If you don’t build it properly, your workbench will show problems during work. Wobbling workbench, uneven surface, workbench shaking problem, etc. are pretty common. Ultimately, an imperfect workbench can lead to fatal accidents.
So, it’s important to know how to build an all in one garage workbench. And we’re here to deliver exactly that information.
Now, let’s build our way through the details-
Necessary Items
Every DIY project needs necessary items. Here we’ve listed up all the necessary items for the job. So, here goes the list-
- Measuring tape
- Woodcutting Saw
- Drilling Machine
- Screw and bolts
- Screwdriver
- 2×4 lumbers (4)
- 4×4 lumbers (4)
- Workbench Top
- Safety Equipment
Basically, it takes 9 types of items and 5 steps to make a garage workbench. Now, we’ll get going with the steps-
Step 1: Measure the Workbench Area
This is the first and most important step. Basically, in this step, you have to make up your mind.
So, take that measuring tape to select the exact location where you want to put your workbench.
Now ask yourself some questions-
- Is the garage used for parking cars?
- How much free space is there in the garage?
- What should be the workbench height?
- How long should the workbench be?
- How much workbench width can I afford?
Based on the answers to these questions, you’ll be able to figure out the Build an All in One Workbench for Your Garage area. Once you make up your mind, write down the initials on a page.
Step 2: Cut 4 Legs and 4 Leg Braces According to the Measurement
Here you will work with the wood and saw. At first, take the 4×4 lumbers and cut down 4 leg pieces. Make sure that you strictly follow your preset dimensions.
Next, take the 2×4 lumbers. With these, you have to make the leg braces. So, cut these according to the width of your workbench.
Step 3: Position and Attach the Leg Braces
Once you’re done with all the cutting it’s time to position everything.
Take up two of your workbench legs. Next, take on the leg braces.
Here’s the tricky part.
Lie down those legs parallelly. Put one of the leg braces onto the parallel legs. Put it in such a way that the brace ends to match the edge of the parallel legs. Once everything is in line, take the drill and bolt the brace into position.
Now, turn around the whole thing. In this position, one end of the legs will be lower than the other. You have to work on the lower end. Take another brace and put it on the lower end. Try to bring it in line just like before. Make sure that the end of the brace matches the edges of the legs.
Once, everything is aligned bolt the brace on this side.
Repeat the process for the other two legs.
Where do you put a workbench in a garage?
There are many factors that depend on making and putting a workbench in a garage. The location for workbenches is dependent upon you. The place where you feel comfortable to keep your goods and access those things easily is the best place for setting a workbench.
There are many kinds of workbench you can buy. Some of those are portable and handy to use. So, you can buy a portable one or make your own workbench for your garage.
Step 4: Cut and Bolt Two Top Supports
This step is extremely tricky. There’s a possibility that you’ll need another pair of hands for this step.
Here you’ll attach the legs of both ends. As a result, you’ll have a platform ready for the next step. Now let’s look at the step details-
At first position both leg-brace pairs parallelly. At this point, try to stand those legs on their sides. So, one of the legs from each pair will lie on its sides. The other leg from each pair will hang onto the air thanks to the support of the braces.
Now, cut down two 2×4 lumbers according to the workbench length measurement. These will be your supports.
Once you’ve got your supports, put those onto the parallel leg sets. Line these perfectly and bolt these. After bolting down both the supports, you’ll notice that your workbench is standing on four legs.
Step 5: Attach the Workbench Top
This is an extremely important part. Workbench top is the place where you’ll do most of the work. A good workbench tabletop can save you from a lot of problems.
Be a bit attentive while choosing your workbench top. You’ll find thick butcher block style wooden workbench tops. On the other hand, thin, hard, wooden sheets are also available on the market. Choose yours based on your budget and probable workload.
Sometimes, you won’t find the perfect size workbench top. In those cases, you can cut it down or modify it according to your choice.
Now comes the installing part-
At first, lay your top in place. Now pre-drill bolt holes down through the supports. But just before that determine the places where you’ll need to drill.
However, if your workbench top is thick, then you’ll need to improvise a bit. In this case, adopt the bottom-up method. This is more like a hack.
Going bottom-up will keep your benchtop bolt free and smooth. But keep in mind that this method is applicable only if you have a thick benchtop.
Once, you’re done with the top installing, you’ll have your functioning workbench.
Extra Step: Finishing Up
Sometimes, people like to modify their workbench. We have a few ideas in here.
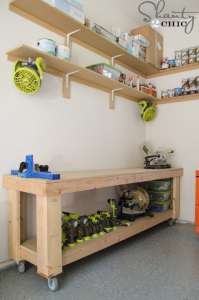
You can always add an extra-low shelf to your workbench. Sometimes, people love to coat their workbench to bring in different textures.
Before going to start, see this video guide:
Final Words
We believe that now you know how to make a garage workbench. Still, if you have any confusion, go and watch some videos.
Nonetheless, don’t forget to take adequate safety measures while building a workbench. Good Luck with your DIY projects. Workbench is used for saving the space of the garage and helps to maintain the tools you used for the garage.
