
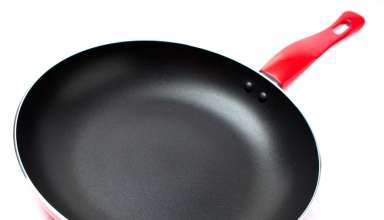
Nonstick pans are such cookware, that every homemaker has to use on a daily basis. So, it’s a very regular fact that they will get dirty and burnt up due to the process of cooking. And before further use, you’ve clean that off anyway. So, what’s the best method to clean a nonstick pan? Will it cost you a fortune, or you can just do with a few household ingredients? We’ve got the answer for you and broken down the steps of cleaning a nonstick pan like a pro. Take a minute of a break from whatever you’re up to right now, and proceed with the steps.
Substance Which is Nonstick Pan Made of
Non- stick pan made to reduce the sticking ability of other materials with the pan during cooking.
The surface of the modern-day frying pan is coated with a substance called polytetrafluoroethylene or otherwise called PTFE under the brand name called Teflon.
PTFE (Teflon)
PTEF is a synthetic substance that is used mostly for a coating for frying and it is done under the brand name called Teflon. PTEF is a metallic substance that being sprayed by an electric-arc-spray system to a stainless-steel surface of the pan.
One to seven, sometimes more layers are sprayed onto the stainless-steel surface of the pan according to the pan’s material to create a non-stick pan. The number of layers that are sprayed or rolled onto the pan determines the quality of the pan. Better quality is measured by the materials used for the coating and the amount of coating which is less likely to flake off from the pan while cooking.
Before the steps, here is the list of items and ingredients you’ll need to have-
What Will You Need?
As the process of cleaning a utensil like a nonstick pan involves fighting with stubborn dirt and oil, you need a few items at first. Here is the list of items you need throughout the process-
- Water.
- Dish soap in liquid form.
- Vegetable oil.
- Baking soda.
- Paper towel.
Some of these ingredients might be replaced by better alternatives, in case you don’t have them right now. But make sure that they are equally or more effective, however.
Steps of Cleaning A Nonstick Pan
If you have got the items and ingredients in hand, here are the steps to go with the cleaning process-
Step 1: Prepare the pan
You can not start cleaning the pan right after it’s from the oven or cooker. So, let it be cool first. You can be rinsing it through the water. But don’t rinse it with too much cold water, as it will take the pan through thermal shock.
Check the temperature for whether it has been taken into ambient temperature or not. Once it is, proceed to the next step.
Step 2: Scrub It Well
Take the sponge and dip it into the dishwasher soap solution. In case you don’t have a sponge to do that, you can use a brush as an alternative.
Now, take the wet sponge or brush and rub it onto the oily surface of the nonstick pan. Make sure to do that in a circular motion, as it will cover up the maximum area in this way.
Keep in mind that, you should not use a complete metal scrubber at this stage. A metal scrubber will damage the coating and leave it with permanent scratches.
Also, don’t use any kind of harsh cleanser that is not prescribed for use on nonstick pans. Cleanser solution like bleach, oven cleaners, etc is usually used for porcelain or floors. So, they are not recommended to use on nonstick pans at all. Otherwise, they will damage the surface of the pan instead of cleaning it off.
Step 3: Focus on the Outside of the Pan and Handle
The surface that you cook on a nonstick pan is the main area where all the dirt and oil take place. But while scrubbing(in step 2), don’t miss the outside area or the handle as well. Especially with large-in-size pans like a t-fal frying pan, these areas need some serious attention.
Because the handle and the outside area also contains oil splits or stains that are needed to take care of. You can use the same cleaner solution and the same scrubber to continue with the process. But make sure to clean it off before scrubbing onto the outsider portion of the pan.
Step 4: Rinse It Off
Once the whole area(both inside, outside) and the handle is scrubbed properly, clean it off with normal water. In case you can manage to rinse it with slightly warm water, that will be even better. Because warm water itself will work effectively to take off the dirt and oily particles from the surface of the pan.
Step 5: Fight The Burnt Spots Now
Once you are done with the regular cooking oil stain, now it’s time to fight for the hard to tackle burnt spots. You can clearly identify the difference between these two kinds of spots from their color.
To fight the burnt spots, you need to have a bit of kosher salt and apply that onto the burnt area. A few drops of water will make a paste of kosher salt, however. And you can do that for a better result.
Now, once the pasta is done, use a clean sponge to scrub it. Instead of scrubbing, you can use dislodging as another scrubbing method. This practice is more effective for fighting burnt spots.
Once again, don’t scrub too hard on the surface. We know that burnt surfaces are way more stubborn than regular oil stains, but you have to stay within your limit.
While scrubbing, make sure that the whole scrubbing effort is working onto the burnt spots only, not the pan surface itself. Otherwise, it will leave permanent marks of damage.
Once done, rinse it off with water as you’ve done once before. This time, you won’t have to look for warmer water, as that doesn’t have anything to do with the burnt spot.
Step 6: Time to Season The Pan
Once you are done with both the oily stain and the burnt spots, it’s time for some final treatment. We will call it seasoning.
Before heading into this step, make sure that the pan surfaces are clean and dry.
Now, take a dap of vegetable oil, and run it on the surface of the cooker. The amount of vegetable oil should be less than a tablespoon. For rubbing, you can use a paper towel or something similarly soft like that.
Once the rubbing is done, you have to take off the excess oil that is left on the surface. You can use another piece of fresh paper towel to do that. After taking the oil off, there will be nothing but a thin layer of vegetable oil left as a coat on the pan surface. And that’s what we would call the seasoning or conditioning.
Bottom Line
The process of cleaning might take some more or less time based on what size of nonstick pan you’re dealing with. No matter whichever size it is, the steps will be the same for them all. Good luck with your cleaning process!

